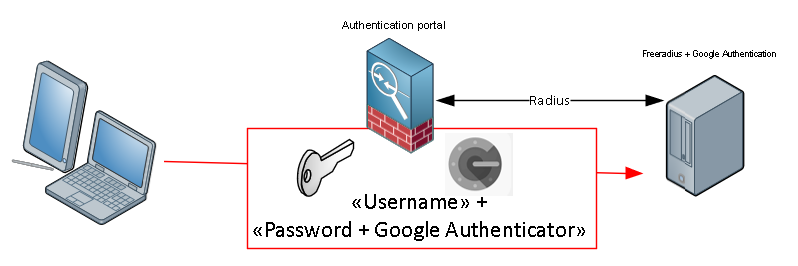
TL;DR : Enable free 2FA using an Ubuntu server, Google authenticator and FreeRadius on service supporting radius authentication.
So, I’ve been messing around with this for a while, and I decided I’d create a post showing how to do it.
Basicly i have a small Ubuntu Server, with Free radius, and Google authenticator module. Using the users defined on the Ubuntu server as allowed-users.
Step1: Start installing the needed tools on the Ubuntu server running this command

This will install the applications and tools you need. There are different ways of setting up free-radius in terms of the user running the service, but since I hate services running as root I used the freerad user account with lower privlegdes.
Step 2: edit the /etc/freeradius/users file, and add the following:

Step3: edit the /etc/freeradius/sites-enabled/default and remove # before PAM

Step4: edit the file /etc/freeradius/clients.conf. Add these lines to the end. Change the ip-adress allowed andradius secret to whatever you need it to be, I recommend using a password generator…

Then Restart the service: sudo service freeradius restart
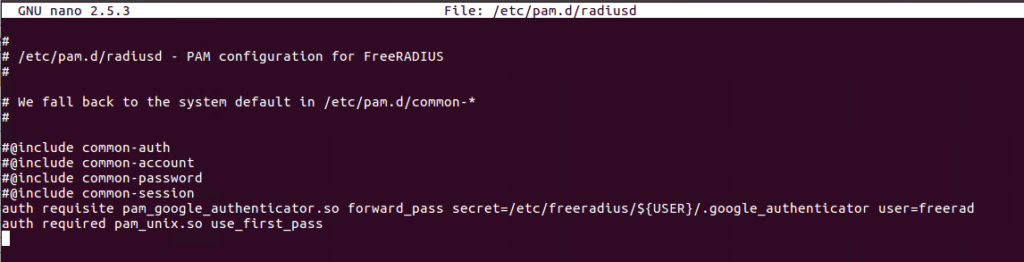
Step 5: Then edit the /etc/pam.d/radiusd file to define the google authenticator:
Step 6: For each user you need to create a google authenticator token. running the command google_authenticator as each user will guide you trough the process.
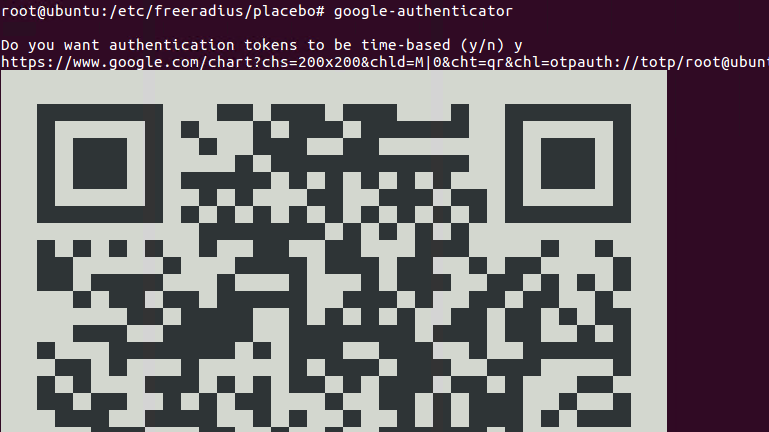
A file named .google_authenticator will be created in each users homefolder. We need to move this file in to the freeradius folder under /etc/freeradius/*USERNAME*
Step 6.1: Since we dont use the root user we need to allow the freerad user to access the google authenticator file for the user (the user is named TEST here):

Step 7: Test the setup using radtest:

If the test is successfull you should see this line:

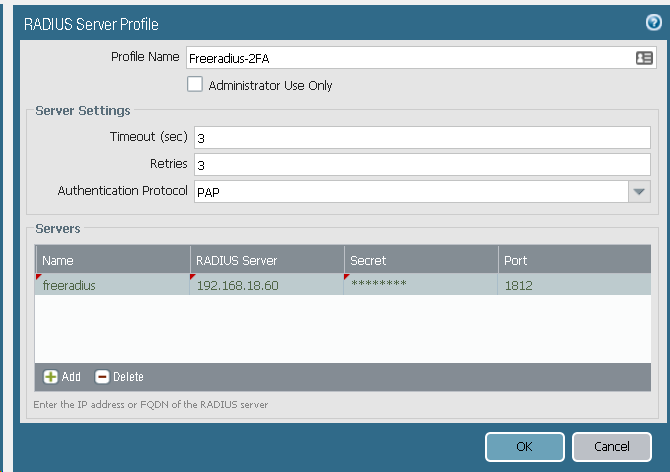
Step 8: Configure the Palo Alto firewall to use the radius server with 2FA for Global Protect VPN:
Go to Device, then Server Profiles, and select Radius. Create new radius profile:
To test the settings, commit and from CLI to the firewall type:

At the passwordprompt type YourPassword+GoogleAuthenticatorCode

For more troubleshooting if this does not work.
tail -f /var/log/auth.log
or
tail -f /var/log/freeradius/freeradius.log

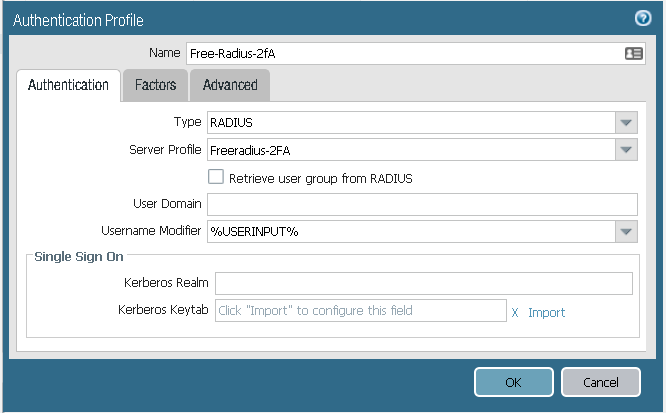
Step 9: Go to authentication profile, and add a new
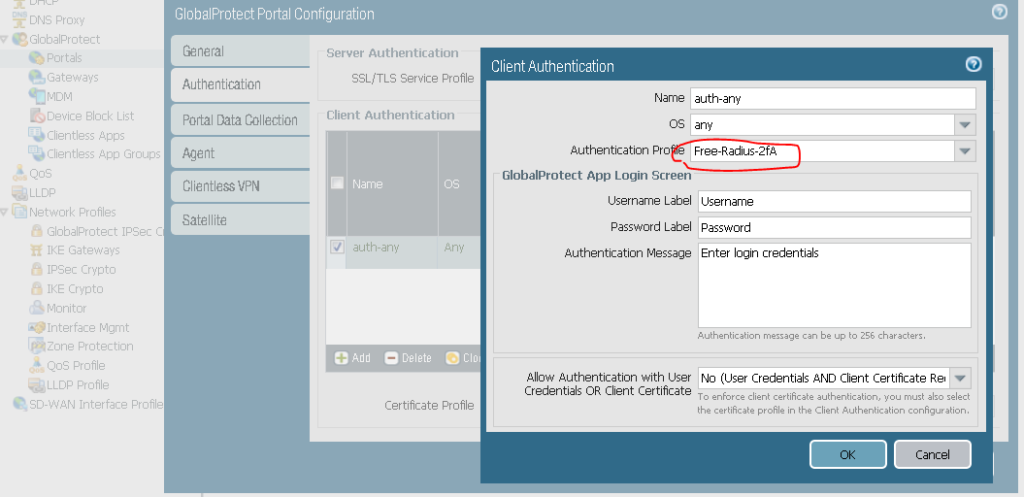
Add this profile to the portal config:
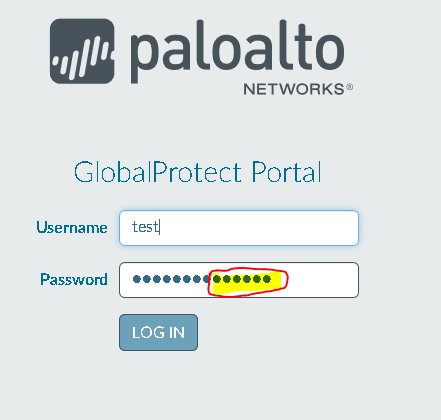
Step 10: Test the config
Commit the config, visit the Globalprotect portal externally. Type in username, and in the passwordfield, type thepassword + the google authenticator code.
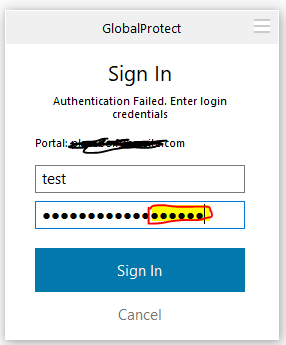
Step 12: Testing the authentication in the GlobalProtect client
Download and install the client, if you havent done it yet. Add the portal address, your username and password+googleauthenticator:
And you’re logged in
Remember to change password at next logon. I use this settings aswell:

LATER: I will do a turitorial on LDAP integration aswell later.